Automount an SSH server in Ubuntu
If you ever need to mount an SSH server in Ubuntu, this is probably the easiest way to do it. This method uses a public/private key pair to authenticate with the server, making the whole process work without passwords.
If you don’t have SSH available to host, but you’ve got a Windows shared directory, I suggest you have a look at a tutorial I’ve written earlier on that topic.
Generating a key pair
You are probably used to connect to your SSH host using a login and a password. This might seem secure, but there is actually another way which is much more convenient, and much more secure. That way is the way of a public/private key pair. If it sounds a bit advanced I will give you a short explanation in a moment, but first you should know that you are not to worry about doing this. It’s quite easy to set up an SSH key pair in Ubuntu.
A private/public key pair has a pretty easy way of functioning. First of all, you should know that the “keys” we are talking about are two small files. They contain a long text which makes up the two keys. These two keys are used to encrypt and decrypt other messages. For instance the data sent back and forth to your SSH host.
The amazing part with these keys, are that they are the only keys which can decrypt whatever message was encrypted with the other key. This makes sure that the server is the only computer able to read your messages, and that your computer is the only which might read the server’s messages. A huge problem with sending passwords over the Internet is the fact that even though the password was encrypted, it might get picked up by someone else who’s sniffing on your wireless connection. That way it might be reused in the encrypted form to log back in on the server. SSH is a bit more sophisticated by encrypting the password differently every time, but essentially it follows a pattern which is easily decrypted.
With a key pair the connection is way more secure, and in short terms it works like this:
- Your computer connects to your host
- The server sends back a message, for instance “hi!”, encrypted with your public key
- Your computer decrypts the message with your private key, reads it as “hi!”, and encrypts it again
- The server recieves your encrypted message, decrypts it with the public key, and checks that the message is the same as when it was sent out. You are now logged in.
This way the server knows that you are who you say you are for two reasons: You are the only one who could decrypt the message with your key, and you are the only one who could encrypt the message again so that it could be decrypted by the server.
The reason we call them private and public keys are pretty obvious. The private key should be kept private so that nobody else may pretend they are you, but the public key may be spread around (thereby ‘public’) since it is useless for anything but encrypting messages for you.
Enough with the theory, get to the tutorial already!
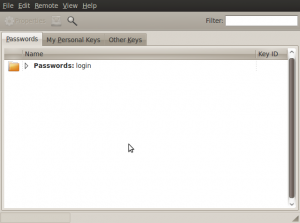
To generate a key pair in Ubuntu, go to Applications > Accessories > Passwords and Encryption keys. A window like this should show up:
Click File > New…
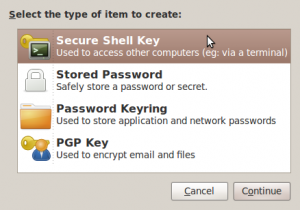
Choose Secure Shell Key and click Continue.
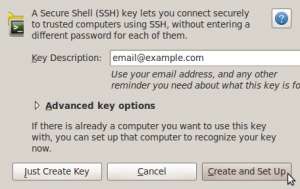
Type in your e-mail address and click Create and Set Up.
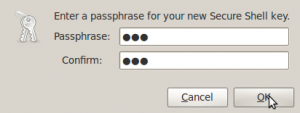
Add a passphrase for the key. This might be anything you’d like. It just makes the key a bit more secure.
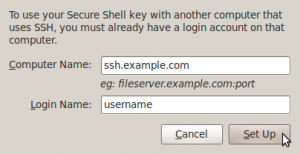
Now, type in the address of your host and your username and click Set Up.
You will be prompted for your SSH password. Type this in and click OK.
Ubuntu will now take care of the rest for you, and you should be able to connect to the server without any hassle.
So, how do we mount it automatically?
After you have generated your keypair, you just go to System > Preferences > Startup Applications and add the following command:
sshfs username@server.example.com: /home/username/myssh
That is how easy it is. If you, like me, are using a server which formats the folder names with norwegian characters, you might want to add
-o modules=iconv,from_code=ISO-8859-1
to the end of the command, making the whole command look like:
sshfs username@server.example.com: /home/username/myssh -o modules=iconv,from_code=ISO-8859-1
